Sunday 2nd October 2011

A rare few days of autumn sunshine has left the skies clear for a couple of nights and given me a chance to image some old favourites.

In the last few weeks I’ve:

  • Installed the Atik 16ic as the main imaging camera
  • Installed the QHY5 as my guide camera with all the driver issues associated with it!
  • Adjusted the primary collimation on the main scope

It may not sound like much but those few changes have taken time to get right and I’ll need more clear nights before I’m happy with the results.

I’ve found that if I keep my guide camera exposures to 0.5 seconds I don’t get too much movement and I’ve been able to take images as long as 5mins.  After stacking the 5min exposures in DSS (Deep Sky Stacker) I thought the focus was out but it seems there’s just too much movement and the resulting stack looks more blurred than the individual frames.

I may suggest on the EQMOD forum that the software could include a timed shutdown option as I leave the system imaging overnight and hope the scope doesn’t get jammed against anything before I awake and rescue it.  So far I haven’t had any issues but if I could issue a “Park at 4:30am” command I’d feel a lot happier and may even sleep longer :).

Images

So here are a few images from the last 2 or 3 nights. All have been stacked in DSS with curves and levels in Photoshop:

NGC6946 – where I found the supernova a couple of years ago. This is a stack of 20 x 1 minute exposures.

Images from an clear autumn sky

The Crescent Nebula – 24 x 1 minute exposures

Images from an clear autumn sky

I’ve never taken a good image of the crescent, this is probably the best but it remains a tricky object, being just too big for the FOV with the 16ic. Maybe I’ll redo this with the Canon when I next switch the camera’s around.

NGC7331 is a spiral galaxy in pegasus. I haven’t done it justice here as I’m sure with the right camera this would be awesome. The galaxy has a number of smaller galaxies in the same FOV making this a nice object to image.

The two images shown here are 23 x 5mins for the top images and 13 x 3mins for the bottom. Dirt on the primary mirror, mist, poor guiding due to fogged up guidescope all contributed to these images not being exactly what I was hoping for.

Images from an clear autumn skyImages from an clear autumn sky

Another object commonly imaged by us amateurs, M57 the Ring Nebula. I’m happy with the sharpness of the stars inside the ring but disappointed with the overall ring which shows more detail in my earlier webcam images than it does with the more sensitive Atik.

The top image is 23 x 30 second exposures and the bottom is the same image with IC1296 highlighted. IC1296 is a 15.5mag galaxy which is overshadowed by its more well known neighbour.

Images from an clear autumn sky

Thursday 27th December 2007

I haven’t had a chance to take my new Atik16ic out for a test run yet, but I did try a dark frame and I’m a little concerned. Is it normal to see a darkframe like this?

Click on the image to see original size

This was 20 seconds with the lens cover on. I was hoping for a completely black image and was very surprised to find this light area across the image. I ran several test frames using  ArtemisCapture and this image was one of the last when the camera had been on for several minutes. The image was taken indoors, the room temperature was around 20°C any feedback would be very helpful.

Wednesday 26th December 2007

The sky has been overcast for a couple of weeks with no sign of a break in the near future – I blame all the astro kit that people had for Christmas! (and that includes me ;) )

As well as the Atik 16IC I was surprised to have another SPC900NC under the tree which is just what I need for planetary work. Since modifying my first SPC900 I’ve found it’s great for the long exposure work but a bit hit and miss in video mode. I think this is down to me not connecting the ground of the camera to the ground of the parallel port – but that’s another story.

Anyway, in order to get the camera into the 1.25″ eyepiece tube I need to fit an adapter, which I happen to have from my first camera which is now rehoused. The process is very simple and I’ve taken some photos to demonstrate how:

premod.jpg
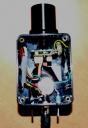
Firstly I removed the stand from the back of the camera by gently twisting it.

removecap.jpgNext you need to remove the light grey cap which surrounds the lens.

Ease a small screwdriver into the gap between the cap and the camera body and it’ll pop out.

lensin.jpg
This picture shows the grey cover removed and the black lens assembly in place. The lens is unsrewed with your fingers, no fancy tools required.

You can see a scratch where I wasn’t too careful with the screwdriver – oops.

lensout2.jpg
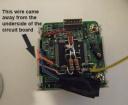
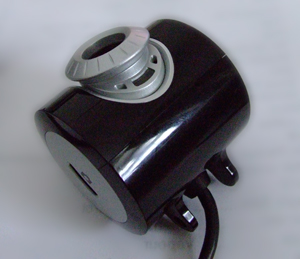
Here the lens has been unscrewed clearly showing the IR filter which looks pink on the back of the lens.

I’ve tweaked the image to show the CCD.

adapterfitted.jpg
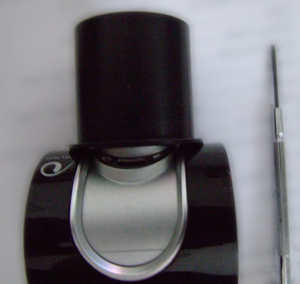
Finally screw the 1.25″ eyepiece adapter into the camera. Don’t forget the CCD is now exposed so if you have a cap to cover the end of the adapter now would be a good time to fit it. I don’t have a cap but my balow lens does so I leave it attached to the camera when not in use.


This is not a “modded” camera in the true sense as the circuitry hasn’t been moddified but with the simple alteration the camera is now ready to point at Mars on the next clear night.


Sunday 5th August 2007

We had guests over last night so I played the host and BBQ master, which required me to leave my scope indoors. I can’t complain, we had a good evening.
1004x.jpg
After a scorching afternoon today with temperatures approaching 30°C the clouds rolled in and the forecast suggested rain by the morning. Another evening lost, but also a chance to take a look at the 1004x and see why it didn’t work the other night.

I lifted the lid on the camera and removed the 1.25″ eyepiece adapter to release the camera board from the housing. There’s only one wire soldered to this board which is variable boost as documented elsewhere on this site. This yellow wire connects to a switch then through a variable resister and fixed resister to ground.  I checked the solder joint by picking at it with a pointy probe. No movement detected. I then inspected the connector I use to link the yellow wire to the wire which comes from the switch, again everything looked ok.
k3ccd_1004x.jpg
I powered up the camera, linked it to K3CCDTools and got the same image I had the other night. Covering the CCD causes the light areas to darken so it looks like something is going on. A quick check with the multimeter confirmed 12v at the power connector, so the issue is on the board rather than with the connections. I use the same frame grabber with my ICE camera so I know that’s ok.

I powered off and set about reconnecting the board to the case using the eyepiece adapter. I now noticed the camera board was very hot to touch, not just the lens holder which acts as a heat sink, but the whole board. I think I just found my problem. Now I reconnected the power while watching the output on the screen, the image appeared normal for a split second then returned to a smudgy blur.

So it seems like the camera is unusable. There’s been a thread on QCUIAG lately regarding peltier coolers, I wonder if the camera would work if I could keep the temperature down.  Seems like another project has just taken shape :)

———

I’ve also ordered a Baader UV/IR Blocking filter from Rother Valley Optics which should arrive early next week. I chose RVO as there was no delivery charge and the item was the same price as most other outlets.

I’m hoping this filter will help with planetary detail although it seems my original reason for wanting it, to reduce star bloat, is not an issue with a Newtonian scope. buvir.jpg

Star bloat occurs when lenses cannot focus all frequencies (colours) of light to a single point with IR being the main cause of this. Mirrors, as in the Newtonian scope, are able to focus all frequencies to a single point and therefore are not prone to “bloat”. I’ve been advised that an IR filter will however help me to capture more realistic colours and will certainly help if I put it onto the guidescope. Although this again is a contentious issue with some people preferring a bloated star to guide on as it’s easier to track.

Thursday 26th July 2007

Finally I got to the bottom of the LX modded camera not working. The error it seems was intermittent, so it appeared to work when plugged into my one PC then failed to work when plugged into another.  The fault was a wire had lifted off the board and taken part of the solder pad with it. With the wire being a single strand from a CAT5 cable it was very stiff so on occasion would sit back in the position from which it came.
brokenwire.jpg

As soon as I found this I resoldered the joint replacing the stiff wire with a more flexible multi strand type to prevent stress on the joint. This is important as the solder pad is now damaged and there’s not much left to solder the wire onto.

I managed to reassemble the camera without introducing further faults and a quick test showed the issue has been resolved.

The SPC900NC is my best planetary camera as well as being my only LX camera, so now that it’s workingI hope I get a clear night to try for Jupiter again. I had a look at the collimation on my scope last night and adjusted the secodary which appeared to have been a little off centre. I think the last time I adjusted it was during a late session and I must have got it close and left it. The collimating cap I have with a small central hole that fits into the eyepiece holder requires your eye to be placed very near to the hole in order to check for concentric circles in the secondary reflections. As I wear glasses this is not possible and without the glasses I can’t see to the bottom of the telescope tube! Perhaps I should collimate with a camera in the eyepiece holder?

Anyway, I’ll document my next visit to the patio and I’ll let you know if the mirrors are aligned or not.