Monday 13th August 2007

I aimed my video camera skywards last night (Sunday 12th) to try and pick up a perseid or two, but the camera is not sensitive enough and I didn’t get anything.

I watched for a while and saw one bright meteor that travelled south to north, followed quickly by two more travelling east – west but I don’t think any of these count as perseids.

 It seems from the guys on QCUIAG that I should have used my modified SPC900NC with a normal lens. I could have set it to 10 second exposures and left it for hours, I’ll know better next time.

By 12:30 I’d had enough, nothing more to report.

Thursday 9th August 2007

jupiter-to-antares.jpg
I set everything up ready last night, but the forecast was wrong and there was hardly a break in the clouds. The best I managed was a 2 star alignment and that was only because I could get Arcturus through the coulds with a 1 second exposure. I didn’t get any images with the SPC900 but I did mount the Fuji S9500 piggy style and got some wide angle shots of Jupiter and the Deneb area.

This image is Jupiter in centre with Antares the lower of five bright stars below. The area also encompasses M80 and M4 but the sky is too light to see them although M80 is just visible if I tweak the levels in Photoshop.

You can see from the orange sky how bad the light polution and high clouds were.

The camera was set to 30 second exposure at F5, ISO800.

 The star to the right of Jupiter is not a moon as I first thought, but Omega Ophiuchi, a magnitude 4.43 star.

The image was taken at 08-08-2007 22:17BST

Friday 3rd August 2007

Where shall I start, I’m almost glad it’s cloudy tonight so that I can catch up on some processing and some much needed sleep :)

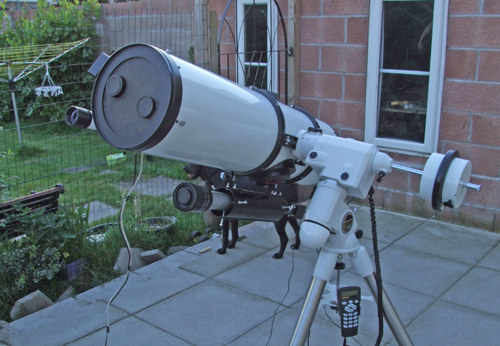
Tuesday: I attached the “guidescope” and had a go at autoguiding, but my 1004x wasn’t working and the SPC900NC was needed for imaging. I did try the SPC900 just to see if the guidescope was up to the task and was disappointed to find that stars couldn’t be focused to a point. I think this may be due to the small pixel size on the CCD and hope the 1004x will do a better job when I get it working.  After several hours of playing with different guide software I ended the session with some images and got my best M82 to date.k3ccd_0005-m82.jpg 
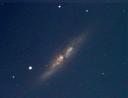
This image was made by stacking 24×40 second frames using Registax and finishing the image off in Photoshop.

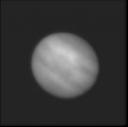
I also got a good M57 and some Jupiter shots, but I’m not happy with the results I’m getting with the SPC900 in “video” mode, so have been using the ICE and Trust cameras for planetary work.

k3ccd_0000-alb-a.jpg

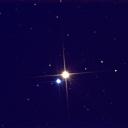
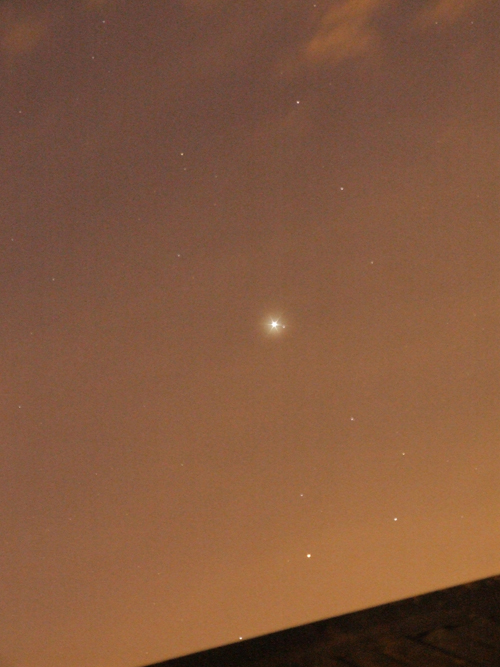
Wednesday: I wasn’t happy with the setup and after a 3 star alignment chose Albireo in Cygnus at random to check if the mount was working. What a surprise to find this jewel winking at me from the center of my screen. Id never looked in this direction before and was surprised by the colour difference brightness of this double star.

I got some more M82’s and also bagged Mizar while I was doing the doubles. Taking a little time to set the mount up properly is paying off with better tracking which in turn leads to longer exposures. I pushed the camera to over 60 seconds just to see how it held up, but with a slight breeze nudging the scope from time to time I didn’t get many usable frames. I also took time to play with the camera settings and found that reducing the gamma and gain controls helped me keep the backdrops darker. Every night I learn something new.

Thursday: I started by getting a few more shots of Albireo to show my son before his bedtime, but it doesn’t get dark until 10:30 so he wasn’t able to stay up to see galaxies and nebulae. We’ll have to wait until October for dark evenings, and hopefully by then I’ll be better at taking these long exposure shots.

After slewing across the sky making sure the mount was aligned I hit the tour button on the hand controller and was amazed to see the Swan Nebula appear before me. I hadn’t considered the SPC900 sensitive enough to pick up colourful nebula, but with no breeze the LX modded camera was happily doing 40 second exposures and before long I had 24 frames saved to disk.

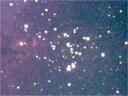
Happy with my first southerly nebula I entered M16 into the controller but wasn’t able to make out any nebulosity only a group of bright stars. I quickly fired up Starry Night and checked which Messier objects were visible in the low southern sky and armed with a list I returned to the scope. M8 was next, and after tweaking the camera settings I was able to get 20 frames at 30 seconds each.k3ccd_0009-m8.jpg WOW, the nebula showed up easily on the screen and the stacked version can be seen here.

Something that is apparent from this image is that I need to buy an IR filter. The stars are far too bloated and I’m sure a filter will reduce them to pin points. My LPR filter does a good of taking the orange glow out, but I’ve dropped it into conversation with my wife and will take a look for one online after completing this post.

After M8, I turned to M18, just to get it onto my Messier chart. Open clusters are not too impressive without a focal reducer, perhaps I’ll drop that into conversation as well :) Something that puts me off buying a focal reducer is that the Newtonian scope will need the mirror shifted upwards in order reach focus. I’ve only just got the collimation sorted out so don’t want to mess around with primary again for a while.

Next was M20, again I couldn’t see anything on the screen and was about move to another object when a sideways glance revealed what appeared to be a dark area near two bright stars. I centered the image on the stars and tweaked the camera settings again. The nebula was there but only just visible.  26 frames at 40 seconds each gave me something to work with and a recognizable image has now been added to my chart (see images).

It was getting late again, but not wanting to squander an opportunity and knowing that I could have a later start in work the next morning I turned the scope on M16 again.

Now that the camera was set to 40 seconds and the brightness, contrast, gamma and gain where set to show fainter features, I was just able to make out a small area of nebulosity to the mid left of the image. I increased the exposure to 90 seconds, started imaging and went indoors to complete a sudoku. It was far too late for puzzles, and I was glad I’d used pencil to randomly enter numbers in the empty squares. Too many late nights and early starts where starting to get to me.

k3ccd_0012-m16.jpg

With only ten frames recorded I cancelled the session and packed everything away. On processing this last image I found only 1 frame usable, the others were all spoilled by PE or wind or my dog running around the mount, whatever it was I know this is one nebula I’ll be revisiting when I get another clear night.

I’m off to look for filters now………

Oh by the way, I’ve taken the guidescope off for now until I can fix the 1004x and test it with the scope in daylight. I don’t want to waste valuable hours under a dark sky trying that again!

guidescope1.jpg

Wednesday 25th July 2007

I managed to get 30 minutes imaging last night between clouds, but still had trouble with the long exposure so went straight for the Jupiter shots with my Trust camera. I’ve had a look this evening and completely uninstalled K3CCDv1 and v3 then reinstalled v3 and all seems ok. I’m not sure what happened but it all stems back to me installing autoguiding software so my money is on a driver issue.k3ccd_0001a.jpg

It was really difficult to focus the scope and having processed the 5 sequences I managed to record I can see the collimation is out again. I’ll take a look this evening, I can’t see it staying dry so there’s no chance of going out to do any imaging.

My Shoestring Autoguider interface arrived today but I haven’t made a mount for the guidescope yet, so I’ve dropped it into my box of goodies for another day.

Thursday 19th July 2007

On the drive home from work yesterday I was looking at the clear sky, with just a few high clouds, and thinking maybe I was going to have another chance to test my modded spc900nc. As the evening dragged on and the sun dropped lower and lower to the hills behind my house I readied the mount and prepared my box of gadgets for an evening of imaging. It seemed like an age waiting for the first stars to appear and even though Arcturus was shining high in the south west, Jupiter was the first shiney to emerge from the darkening sky.

I spent an hour going through lists of visible objects, looking at those that I knew I could do better and adding those that I’d come across since drawing up my last list.  All was ready, time slowed, Venus disappeared behind the hills and I started looking through the polar alignment scope trying to pickup the faint dot that was Polaris. A quick tweak of the RA alignment controls and I was set. I’d referred to “Polar Finder” (see software) before going to the scope in order to get the position of Polaris on the circle of the polar scope, so much easier than setting circles.

All the equipment whirred to life and I set the mount controller to the correct location and time. I then double checked the bolt that holds the mount to the tripod after leaving this loose the last time! After this I did a quick barlowed laser collimation to make sure the optics hadn’t shifted since my last viewing.

Still only Arcturus and Vega visible but I tried for a 2 star alignment. The controller reported “successful alignment” and I slewed the scope around to Jupiter. I was surprised to find the spc900 was working in video mode, I didn’t expect that with the parallel cable plugged in, but it was nice to see 4 moons shining alongside the huge disk of Jupiter. It was still too light to view deep sky objects so I fetched my Trust Spacecam  and 3x barlow from the box and set about tweaking the contrast, brightness and exposure controls until I could make out faint detail on the shiney disk. I ran a couple of sequences with over 1000 frames in each and adjusted the focus between each as I couldn’t tell if the image was focused due to the lack of detail.  I’ll process these later this evening and get the images on here if they’re any good.  I was happy with the tracking, doing the bolt up makes a difference, and as the sky was now much darker I thought it time to try for some deeper objects.k3ccd_0003b.jpg

I started with a 3 star alignment then selected M51, good old M51, and switched K3CCDTools to long exposure mode. The image didn’t show anything. I tweaked the gain, still nothing. I set the camera to 10 seconds, still nothing. You can see where this is going, I should have realised when the camera was operating in video mode that something was amiss. I checked the SC LX settings, then took the camera inside and popped the case off to check for broken wires. Nothing obvious.

My feeling was that after experimenting with guide software I must have installed something that overwrote a DLL used by K3CCD.  I reinstalled K3, I uninstalled the other software, I tried K3 version 1, I even plugged a USB wireless network adapter in and ran Windows Update, which took over 1/2 an hour. It was approaching 1am by now and with work the next day I couldn’t spend any more time trying to fix the camera. An evening that held so much promise ended in frustration an d failure. I suppose I should get used to this in time.

Now in the cold light of day (evening) I’ve had the camera apart again, this time using my Multi-meter in continuity mode to make sure the parallel signal was reaching the 4016. It was, I reassembled the camera and plugged it in again. It still didn’t work. Eventually, I tried something that I’d tried last night, but which didn’t seem to make too much sense. I changed the SC LX settings so that 1’s were 0’s and vice versa. It worked! Why did it work last time with zero as on and now 1 is on, I don’t know, but I’m glad it worked.camera_open1.jpg

I had said in a previous post that I’d take out the LED the next time I had the camera apart, but I haven’t, I don’t think it interferes with the image at all and the risk of me smearing solder over every exposed pin on the camera board far outweighs any benefit I may get from removing it.

So there we are, until the next clear night, I’ve learned a valuable lesson, while it’s pouring with rain use the time wisely to check the equipment is in perfect working order for that once in a blue moon opportunity to stand out in the cold and look skywards.